> For the complete documentation index, see [llms.txt](https://overleaf-pro.ayaka.space/llms.txt). Markdown versions of documentation pages are available by appending `.md` to page URLs; this page is available as [Markdown](https://overleaf-pro.ayaka.space/texlive/vi/lien-quan-den-goi/minted.md).
# {Minted}
Bài viết này cho thấy cách sử dụng [`minted` gói](https://ctan.org/pkg/minted?lang=en) để định dạng và tô sáng mã nguồn của ngôn ngữ lập trình trong tài liệu LaTeX, bắt đầu với một ví dụ:
```latex
\documentclass{article}
\usepackage{minted}
\begin{document}
\begin{minted}{python}
import numpy as np
def incmatrix(genl1,genl2):
m = len(genl1)
n = len(genl2)
M = None #sẽ trở thành ma trận liên thuộc
VT = np.zeros((n*m,1), int) #biến giả
#tính ma trận xor theo từng bit
M1 = bitxormatrix(genl1)
M2 = np.triu(bitxormatrix(genl2),1)
for i in range(m-1):
for j in range(i+1, m):
[r,c] = np.where(M2 == M1[i,j])
for k in range(len(r)):
VT[(i)*n + r[k]] = 1;
VT[(i)*n + c[k]] = 1;
VT[(j)*n + r[k]] = 1;
VT[(j)*n + c[k]] = 1;
if M is None:
M = np.copy(VT)
else:
M = np.concatenate((M, VT), 1)
VT = np.zeros((n*m,1), int)
return M
\end{minted}
\end{document}
```
Ví dụ này tạo ra đầu ra sau:
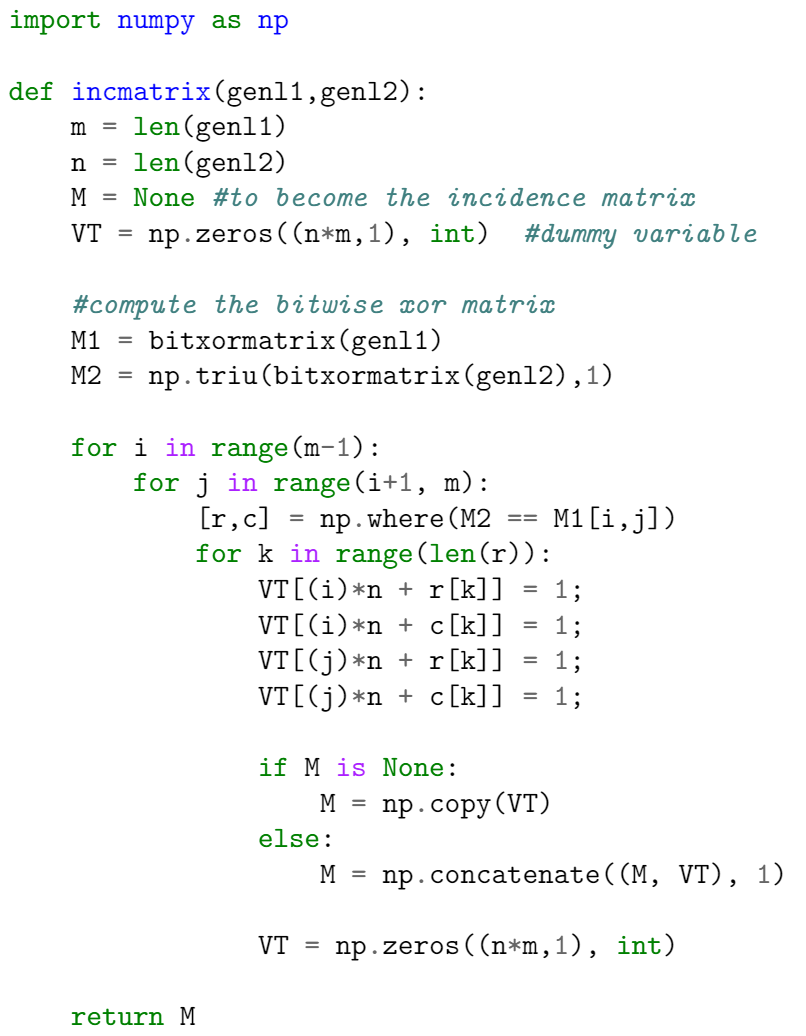
Có hai lệnh quan trọng ở đây. Trong phần đầu, gói được nhập bằng cách viết
```latex
\usepackage{minted}
```
sau đó các thẻ `\begin{minted}{python}` và `\end{minted}` phân định một môi trường sẽ in văn bản nguyên văn bằng phông chữ đơn cách và cũng áp dụng màu cho chú thích, từ khóa và hàm. Tham số `python` là ngôn ngữ lập trình mà mã nguồn được viết bằng. `minted` hỗ trợ hơn 150 ngôn ngữ lập trình và ngôn ngữ đánh dấu cũng như các tệp cấu hình, xem [hướng dẫn tham khảo](https://www.overleaf.com/learn/latex/Code_Highlighting_with_minted#Reference_guide) để xem danh sách các ngôn ngữ được hỗ trợ.
**Lưu ý**: Để `minted` hoạt động với bản phân phối LaTeX *cục bộ* của bạn, cần cài đặt thêm một chương trình có tên là [Pygments](https://pygments.org/) phải được cài đặt. [Overleaf](https://www.overleaf.com/) có thể giúp bạn khỏi phiền phức khi cài đặt nó và phải chạy các lệnh đặc biệt để biên dịch tài liệu — trên Overleaf, các tài liệu dùng `minted` sẽ hoạt động ngay khi dùng.
### Cách dùng cơ bản
Như được minh họa trong ví dụ sau, môi trường `minted` có thể được cấu hình để thay đổi cách trình bày trực quan của mã đã dàn trang. Ở đây, môi trường `minted` sử dụng một số tham số phân tách bằng dấu phẩy theo dạng `key=value`:
```latex
\documentclass{article}
\usepackage{minted}
\usepackage{xcolor} % để truy cập màu có tên LightGray
\definecolor{LightGray}{gray}{0.9}
\begin{document}
\begin{minted}
[
frame=lines,
framesep=2mm,
baselinestretch=1.2,
bgcolor=LightGray,
fontsize=\footnotesize,
linenos
]
{python}
import numpy as np
def incmatrix(genl1,genl2):
m = len(genl1)
n = len(genl2)
M = None #sẽ trở thành ma trận liên thuộc
VT = np.zeros((n*m,1), int) #biến giả
#tính ma trận xor theo từng bit
M1 = bitxormatrix(genl1)
M2 = np.triu(bitxormatrix(genl2),1)
for i in range(m-1):
for j in range(i+1, m):
[r,c] = np.where(M2 == M1[i,j])
for k in range(len(r)):
VT[(i)*n + r[k]] = 1;
VT[(i)*n + c[k]] = 1;
VT[(j)*n + r[k]] = 1;
VT[(j)*n + c[k]] = 1;
if M is None:
M = np.copy(VT)
else:
M = np.concatenate((M, VT), 1)
VT = np.zeros((n*m,1), int)
return M
\end{minted}
\end{document}
```
Ví dụ này tạo ra đầu ra sau:
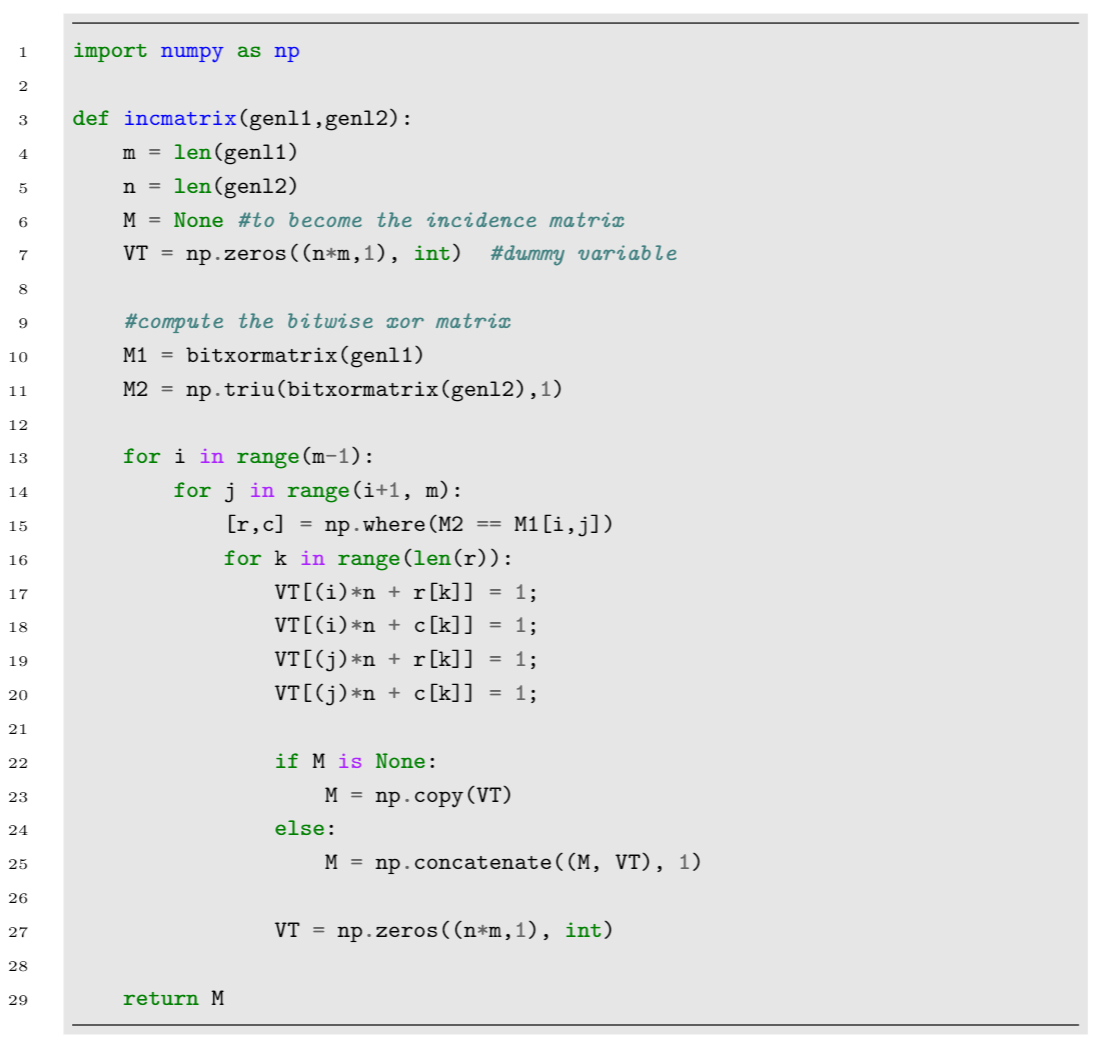
Các tham số được dùng trong ví dụ này là:
* `frame=lines`: vẽ hai đường, một ở phía trên và một ở phía dưới mã để đóng khung nó. Các giá trị khác có thể là `leftline`, `topline`, `bottomline` và `single`.
* `framesep=2mm`: khoảng cách khung được đặt thành 2mm. Các [đơn vị độ dài](https://www.overleaf.com/learn/latex/Lengths_in_LaTeX) khác có thể được dùng.
* `baselinestretch=1.2`: giãn dòng của mã được đặt thành 1.2.
* `bgcolor=LightGray`: màu nền được đặt thành `LightGray`. Bạn cần nhập gói `xcolor` để điều này hoạt động. Xem [Sử dụng màu trong LaTeX](https://www.overleaf.com/learn/latex/Using_colours_in_LaTeX) để tìm hiểu thêm về thao tác màu sắc.
* `fontsize=\footnotesize`: cỡ phông được đặt thành `footnotesize`. Có thể đặt bất kỳ [cỡ phông](https://www.overleaf.com/learn/latex/Font_sizes_and_kinds%23Reference_guide) nào khác.
* `linenos`: bật số dòng.
Các tùy chọn khác có thể hữu ích là:
* `mathescape`: bật chế độ toán trong chú thích mã.
* `rulecolor`: thay đổi màu của khung.
* `showspaces`: bật một ký tự đặc biệt để làm cho khoảng trắng hiển thị.
### Bao gồm mã từ một tệp
Mã thường được lưu trong một tệp nguồn, vì vậy một lệnh tự động nhập mã từ tệp là rất tiện, như được minh họa trong ví dụ sau:
```latex
\documentclass{article}
\usepackage{minted}
\title{Nhập tệp bằng minted}
\begin{document}
Đoạn mã tiếp theo sẽ được nhập trực tiếp từ một tệp:
\inputminted{octave}{BitXorMatrix.m}
\end{document}
```
Ví dụ này tạo ra đầu ra sau:
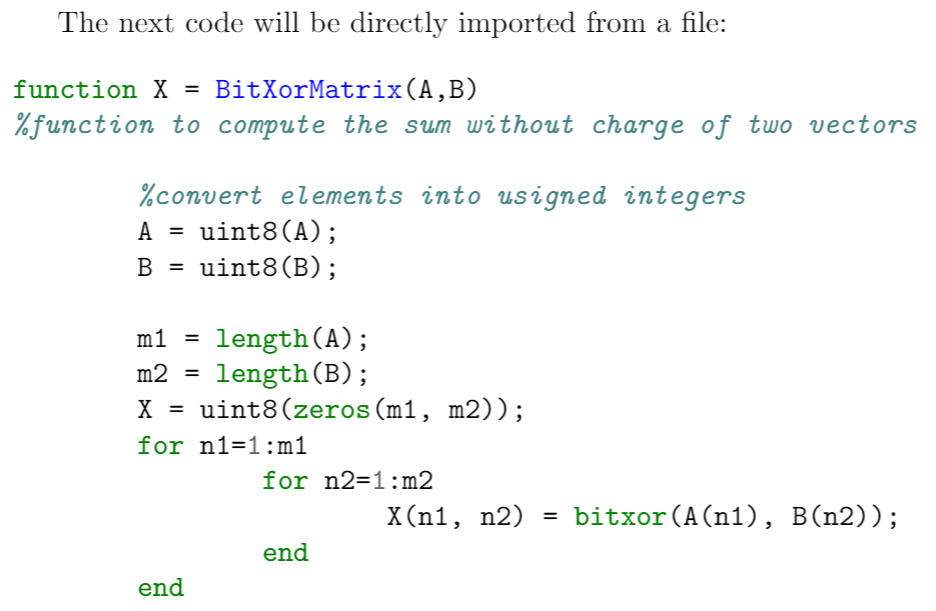 Lệnh `\inputminted{octave}{BitXorMatrix.m}` nhập mã từ tệp `BitXorMatrix.m`, tham số `octave` cho LaTeX biết ngôn ngữ lập trình của mã. Lệnh này có thể nhận thêm hai tham số để chỉ nhập một phần của tệp; chẳng hạn, để nhập mã từ dòng 2 đến dòng 12, lệnh trở thành:
```latex
\inputminted[firstline=2, lastline=12]{octave}{BitXorMatrix.m}
```
### Mã một dòng
Nếu bạn chỉ cần nhập một dòng mã, lệnh `\mint`, với cú pháp được trình bày trong ví dụ tiếp theo, sẽ làm được điều đó.
{% code overflow="wrap" %}
```latex
Định dạng mã một dòng cũng hoạt động với \texttt{minted}. Ví dụ, một đoạn nhỏ HTML như sau:
\mint{html}|
Lệnh `\inputminted{octave}{BitXorMatrix.m}` nhập mã từ tệp `BitXorMatrix.m`, tham số `octave` cho LaTeX biết ngôn ngữ lập trình của mã. Lệnh này có thể nhận thêm hai tham số để chỉ nhập một phần của tệp; chẳng hạn, để nhập mã từ dòng 2 đến dòng 12, lệnh trở thành:
```latex
\inputminted[firstline=2, lastline=12]{octave}{BitXorMatrix.m}
```
### Mã một dòng
Nếu bạn chỉ cần nhập một dòng mã, lệnh `\mint`, với cú pháp được trình bày trong ví dụ tiếp theo, sẽ làm được điều đó.
{% code overflow="wrap" %}
```latex
Định dạng mã một dòng cũng hoạt động với \texttt{minted}. Ví dụ, một đoạn nhỏ HTML như sau:
\mint{html}|Something here
|
có thể được định dạng đúng.
```
{% endcode %}
Ví dụ này tạo ra đầu ra sau:
 Tham số giữa các dấu ngoặc nhọn đặt ngôn ngữ lập trình (`html` trong trường hợp này là ngôn ngữ đánh dấu) với văn bản thực tế cần được định dạng được phân cách bởi ký tự '|'.
### Vấn đề với Overleaf tự lưu trữ
Nếu bạn đang sử dụng sandbox compile và cũng có một máy chủ overleaf để triển khai overleaf, minted có thể không hoạt động tốt. Để biết thông tin chi tiết, bạn có thể xem: [issues/131](https://github.com/yu-i-i/overleaf-cep/issues/131). Bạn cần bật profile lệnh ARM và một số lời gọi hệ thống để minted hoạt động.
---
# Agent Instructions
This documentation is published with GitBook. GitBook is the documentation platform designed so that both humans and AI agents can read, navigate, and reason over technical content effectively. Learn more at gitbook.com.
## Querying This Documentation
If you need additional information that is not directly available in this page, you can query the documentation dynamically by asking a question.
Perform an HTTP GET request on the current page URL with the `ask` query parameter, and the optional `goal` query parameter:
```
GET https://overleaf-pro.ayaka.space/texlive/vi/lien-quan-den-goi/minted.md?ask=&goal=
```
`ask` is the immediate question: it should be specific, self-contained, and written in natural language.
`goal` is optional and describes the broader end goal you are ultimately trying to accomplish on behalf of the user. GitBook uses it to tailor the answer towards what is most useful for that goal.
The response will contain a direct answer to the question and relevant excerpts and sources from the documentation.
Use this mechanism when the answer is not explicitly present in the current page, you need clarification or additional context, or you want to retrieve related documentation sections.
Tham số giữa các dấu ngoặc nhọn đặt ngôn ngữ lập trình (`html` trong trường hợp này là ngôn ngữ đánh dấu) với văn bản thực tế cần được định dạng được phân cách bởi ký tự '|'.
### Vấn đề với Overleaf tự lưu trữ
Nếu bạn đang sử dụng sandbox compile và cũng có một máy chủ overleaf để triển khai overleaf, minted có thể không hoạt động tốt. Để biết thông tin chi tiết, bạn có thể xem: [issues/131](https://github.com/yu-i-i/overleaf-cep/issues/131). Bạn cần bật profile lệnh ARM và một số lời gọi hệ thống để minted hoạt động.
---
# Agent Instructions
This documentation is published with GitBook. GitBook is the documentation platform designed so that both humans and AI agents can read, navigate, and reason over technical content effectively. Learn more at gitbook.com.
## Querying This Documentation
If you need additional information that is not directly available in this page, you can query the documentation dynamically by asking a question.
Perform an HTTP GET request on the current page URL with the `ask` query parameter, and the optional `goal` query parameter:
```
GET https://overleaf-pro.ayaka.space/texlive/vi/lien-quan-den-goi/minted.md?ask=&goal=
```
`ask` is the immediate question: it should be specific, self-contained, and written in natural language.
`goal` is optional and describes the broader end goal you are ultimately trying to accomplish on behalf of the user. GitBook uses it to tailor the answer towards what is most useful for that goal.
The response will contain a direct answer to the question and relevant excerpts and sources from the documentation.
Use this mechanism when the answer is not explicitly present in the current page, you need clarification or additional context, or you want to retrieve related documentation sections.